Stuck on how to use one of our products?
Not sure how to clean them?
Find all the useful support information right here.

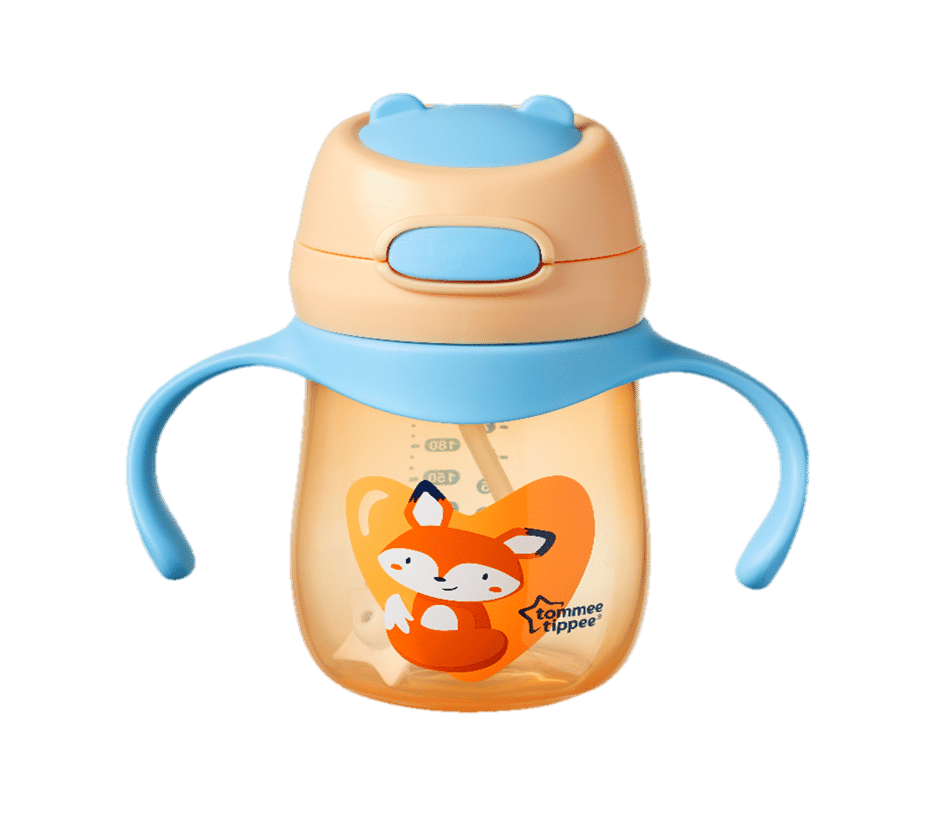
Thanks for purchasing a Tommee Tippee Weighted Straw Cup. This product support page is here to help you use it safely, to let you know how to clean and take care of it, and to answer any questions you may have.
Storage & Use
As with most sippy cups, ours are designed to be used with milk, water or juices that don’t contain pulp. Do not fill this cup with fizzy (carbonated) beverages, formula, or hot liquids.
It’s important that you inspect your cup before each use. Do not store or leave the cup in direct sunlight or near a source of heat, and don’t allow it to contact solvents or harsh chemicals.
This cup is…
Instructions for cleaning your cup
Before the cup’s first use, disassemble and thoroughly clean it. Our insulated cups and weighted straw cups are suitable for sterilisation by cold water tablet/liquid solution only.
All the parts of this cup can be washed in the dishwasher but be sure to place them on the top shelf only, and don’t use solvents or harsh chemicals. To avoid stains, do not allow the cup to contact oil-based foods or tomato-based sauces.
Before every use clean the cup carefully, and always wash it immediately after use. To clean your cup…
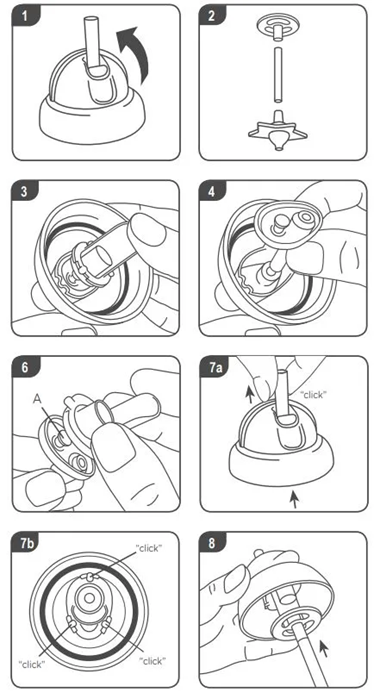
1. Unscrew the lid and open the flip cap to expose the straw.
2. Separate the straw connector, weighted straw, and the star base.
3. Use your thumb to push out the hard valve from under the lid
4. Remove the silicone straw from under the lid.
5. Wash all parts thoroughly in warm soapy water and rinse in clean water. Use brush included to clean straws. To prevent damage, avoid using a brush on the soft part of the valve.
Instructions for reassembling your cup
Always shake parts after washing to remove excess water and leave to air dry before re-assembling. Your cup could leak or be difficult to drink from if not assembled correctly as follows…
6. Align the silicone straw and the hard valve, press together. Ensure part A of the soft side is fully pushed through the hole of the hard side. This is essential to make sure the valve functions correctly.
7. (a/b) Install the silicone straw with the hard valve from under the lid, pull the straw until it clicks. Push the hard valve firmly until the three prongs lock into place.
8. Re-assemble the straw connector, weighted straw and the star base and push firmly to the hard valve.
9. Screw on lid.

Why is my Superstar™ cup leaking?
We’re sorry that your cup is leaking! Your cup will only leak if it is not assembled correctly, and the valve is designed to be 100% leak proof, so please make sure that the cup’s valve is assembled correctly (as per the instructions above) and that the lid is secured tightly. If these checks don’t resolve your problem, please feel free to contact us for further support.
WARNING!
For your child’s safety and health…
Always use this product with adult supervision. Accidents have occurred when babies have been left alone with drinking equipment due to the baby falling or if the product has disassembled.
Please be aware that continuous and prolonged sucking of fluids will cause tooth decay and decay can occur even when non-sweetened fluids are used. The risk of decay is increased if the child is allowed to use the cup for long periods through the day, and particularly through the night when saliva flow is reduced or if the cup is used as a soother.